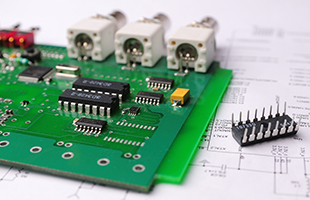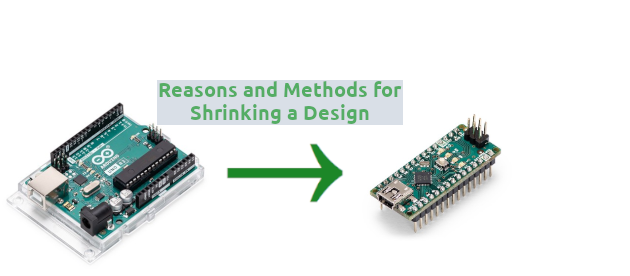
So you’ve done the research and development on some prototype and have a working PCB and a plan for an enclosure, but is the job really done? After a working proof of concept version of a circuit is done, the next step often is to apply various optimizations to the design to improve stability, reduce cost, or aid in the manufacturing and assembly process. Sometimes the need could be as simple as shrinking a design or reshaping a piece to fit the hand more nicely.
Minimization
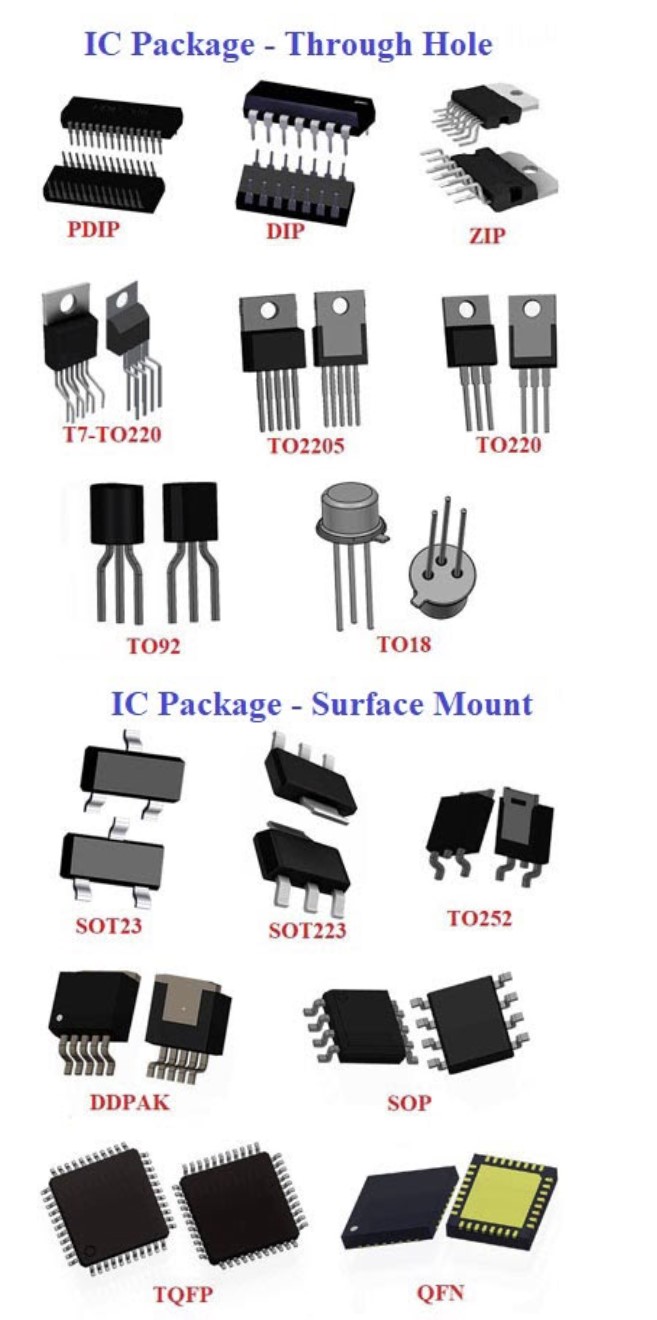 One great method for optimizing a well-developed design is to replace components with smaller package versions of themselves. Many components available on the market are also offered in various package types of different sizes to suit the designer’s needs. Since generally the different package functions identically to their bulkier counterparts bearing the same part number, choosing a smaller version is something that can be done without requiring changes to the design’s overall function like changes to the software or changing a battery type. Here we can see some examples of through-hole type packages that are easily handled and lend themselves to the prototyping stage, along with some surface mount components that only require one PCB layer for mounting while also being drastically smaller than the bulkier options. An example would be an LM317, an adjustable linear voltage regulator that can commonly be seen in the TO220 and TO92 through hole-type packages. It can also be seen in a DPAK package as well, which also has the heatsink always in contact with the PCB distributing the heat from the regulator. Surface mount or SMD components also more easily lend themselves to automated mass production as pick-and-place machines are usually more adapted to SMD packages
Frankenstein Circuit
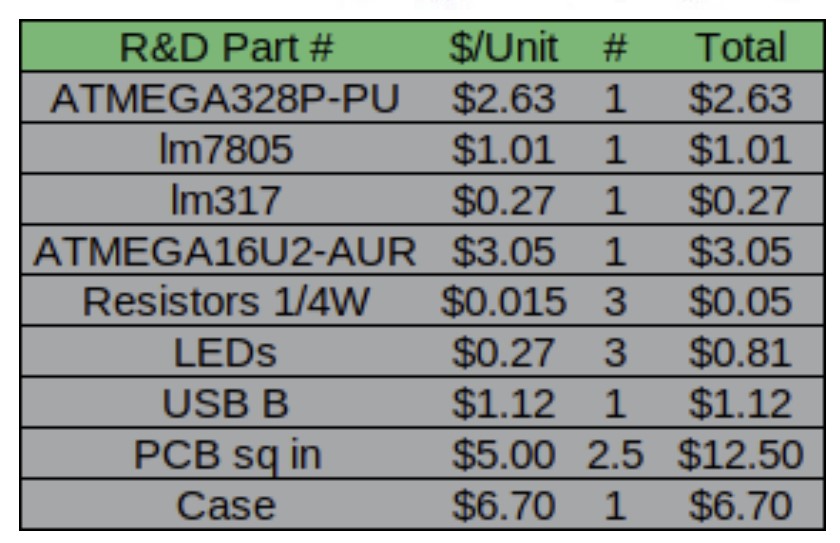 Consider the following hypothetical design for a simple controller board. You might need one microcontroller for main design operations, another dedicated chip for programming the main one through an interface like USB, some indicator lights and their current limiting resistors, a USB plug for programming and power, and a regulator for that power. Here are some parts sampled from digikey that are great for prototyping since the long leads can be used with solderless breadboards allowing rapid circuit testing and modification. The two ATmega chips are the main processor and the programming interface controllers both available in a DIP package. The LM7805/317 are linear voltage regulators, one being 5V and the other being adjustable with resistors for any desired voltage and they both appear in TO220 and TO92 through-hole packages. PCB and enclosure cost behave differently from components that just have set prices, generally smaller PCBs cost less than larger ones down to raw materials which incentivizes taking a second look at whether or not the component arrangement is efficiently done on a PCB or if some things could be made neater. Overall these parts add up to $28.14 per unit and $2814 if you make 100 for inventory.
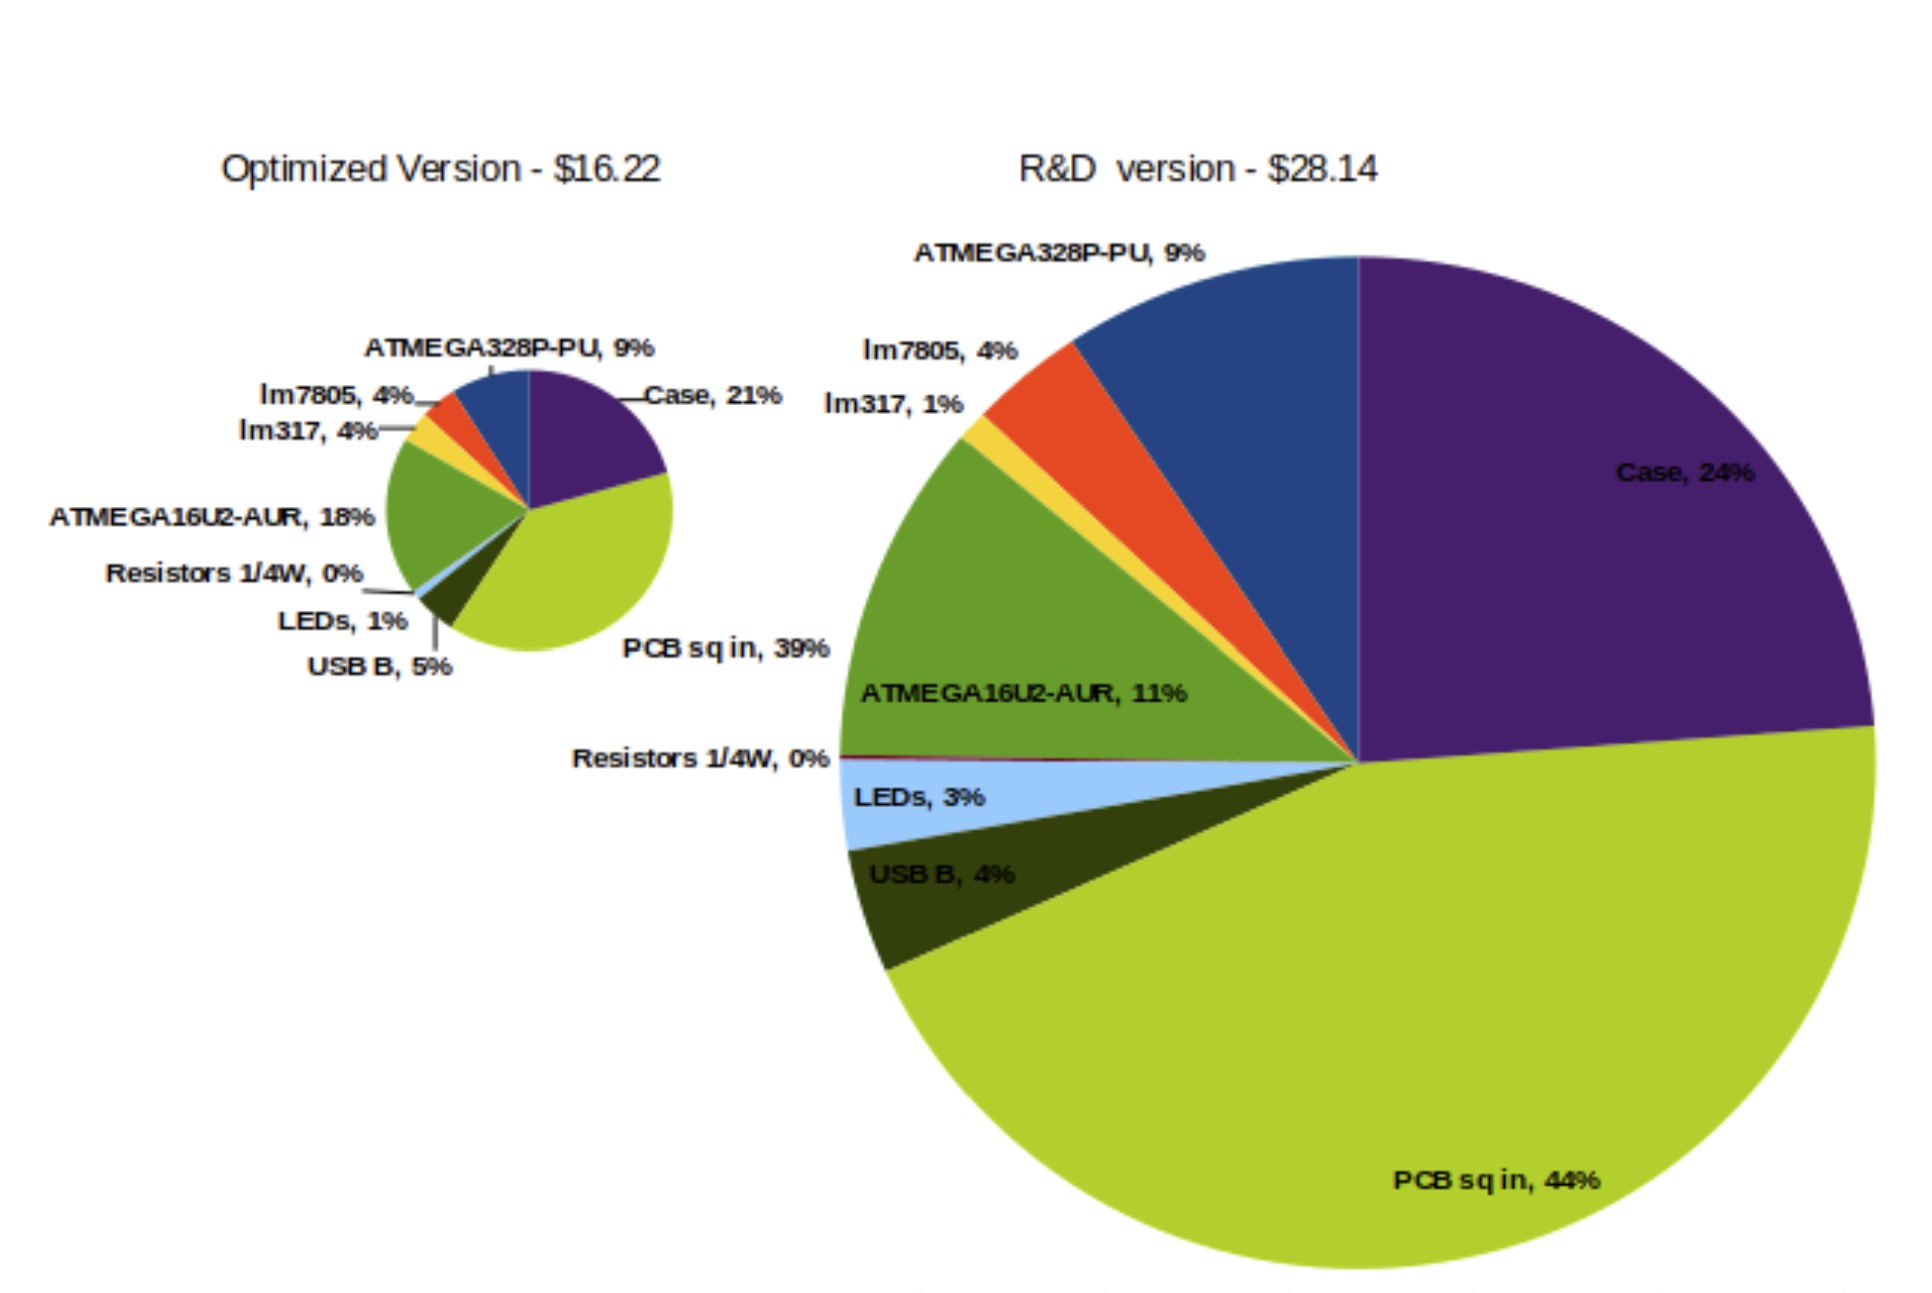
The Little Integrated Circuit That Could
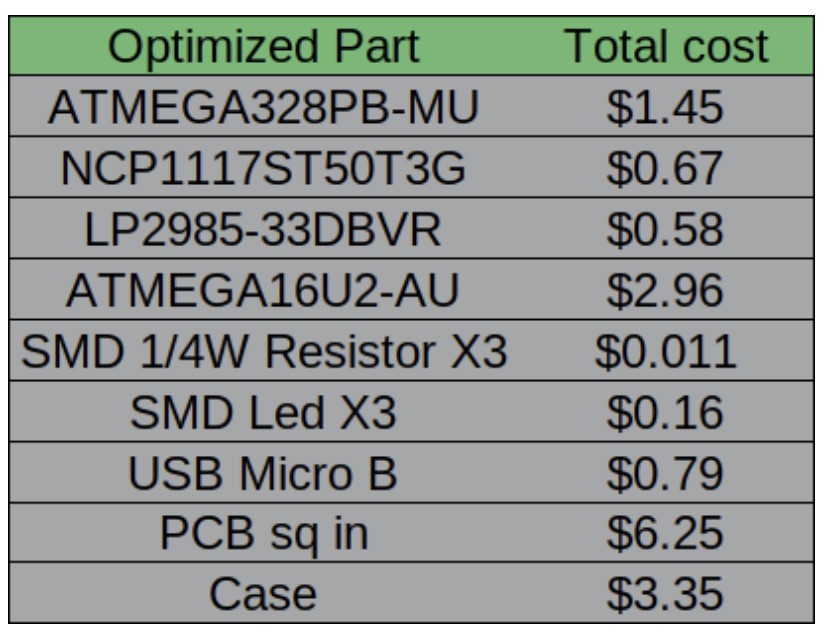 Consider this new list of parts. The two ATmega microcontrollers have the same base part number but the ends are slightly changed. These two parts numbers refer to the QFN and QFP variants of the ATmega328/16 with the surface mount variant of the 328 being 83% shorter in length than the DIP package along the length interacting with the PCB. The NCP1117 and LP2985 are 5V and 3.3V regulators respectively, with the non-adjustable 3.3V representing choosing a purpose-built part rather than making it discreetly. These two regulators come in the TO261 and SC74A package with the 5V surface-mount variant being 40% shorter than the through-hole variant on their length connecting to the PCB. We could ballpark that the PCB size and case could be reduced in size by half, resulting in half the material costs along with every surface mount variant having a lower part price tag than their through-hole counterparts except for the 3.3V regulator. These parts add up to $16.22 or $1622 for 100 copies, which is 42% cheaper than the same design but done with through-hole components. That’s a difference of $1191 that didn’t have to be spent on the 100 units! Overall these results in these two pie charts showing the size of the pies representing the whole part cost and their component proportion cost. These show not only that the PCB was cheaper by itself but also was a smaller portion of the whole design cost.
Knock-On Effects
These components and PCB minimization can have secondary effects, many good but some others should be carefully considered. For example, the DIP and QFN variants of the ATmega328 controller have a 0.3milliAmp difference in power consumption levels at 4MHz and 3V power level. While smaller active components can be more efficient than their larger versions, one must remember that the smaller size means the smaller thermal mass of the whole part, meaning if the power regulator is expected to support a large amount of current, a through-hole version that can have a fin heatsink attachment and a fan could save the whole piece from overheating.
Simplification
Sometimes an operation is simple enough to not require the complexity level of the parts used for development. The ATmega328 controller is a great tool for development, but maybe a particular design could be done using less logical pins, and a $1.40 ATtiny85 or a 33¢ 555 timer IC could satisfy the needs of the design. A $1 RGB led might seem like a bad choice compared to the 81¢ total price for 3 LEDs, but the RGB LED can actually create 7 colors, giving the capacity for 7 unique indications while also consuming less PCB space.
Thinking about doing a product run of an optimized design? Find out our PCB capabilities here, or get a quote here, or call us at (888) 648-5071.